
3D Model Construction and Viewing, an Update, pt. 2
In my initial post on this subject, I finished by constructing a test house in Sketchup, and importing that into a basic Unity game, with typical FPS (first person shooter) style controls- moving with WASD, jumping with space, and looking around with a mouse. Since then, the project has advanced in both of those ways: the house and the game.
As previously discussed, while other 3D model viewers already exist, none that I found allowed you to walk through them akin to a game, which I consider to be significantly more immersive than simply viewing it. Thus, I decided to make my own. Since the last post, the basic coding hasn’t changed- movement and vision work the same.
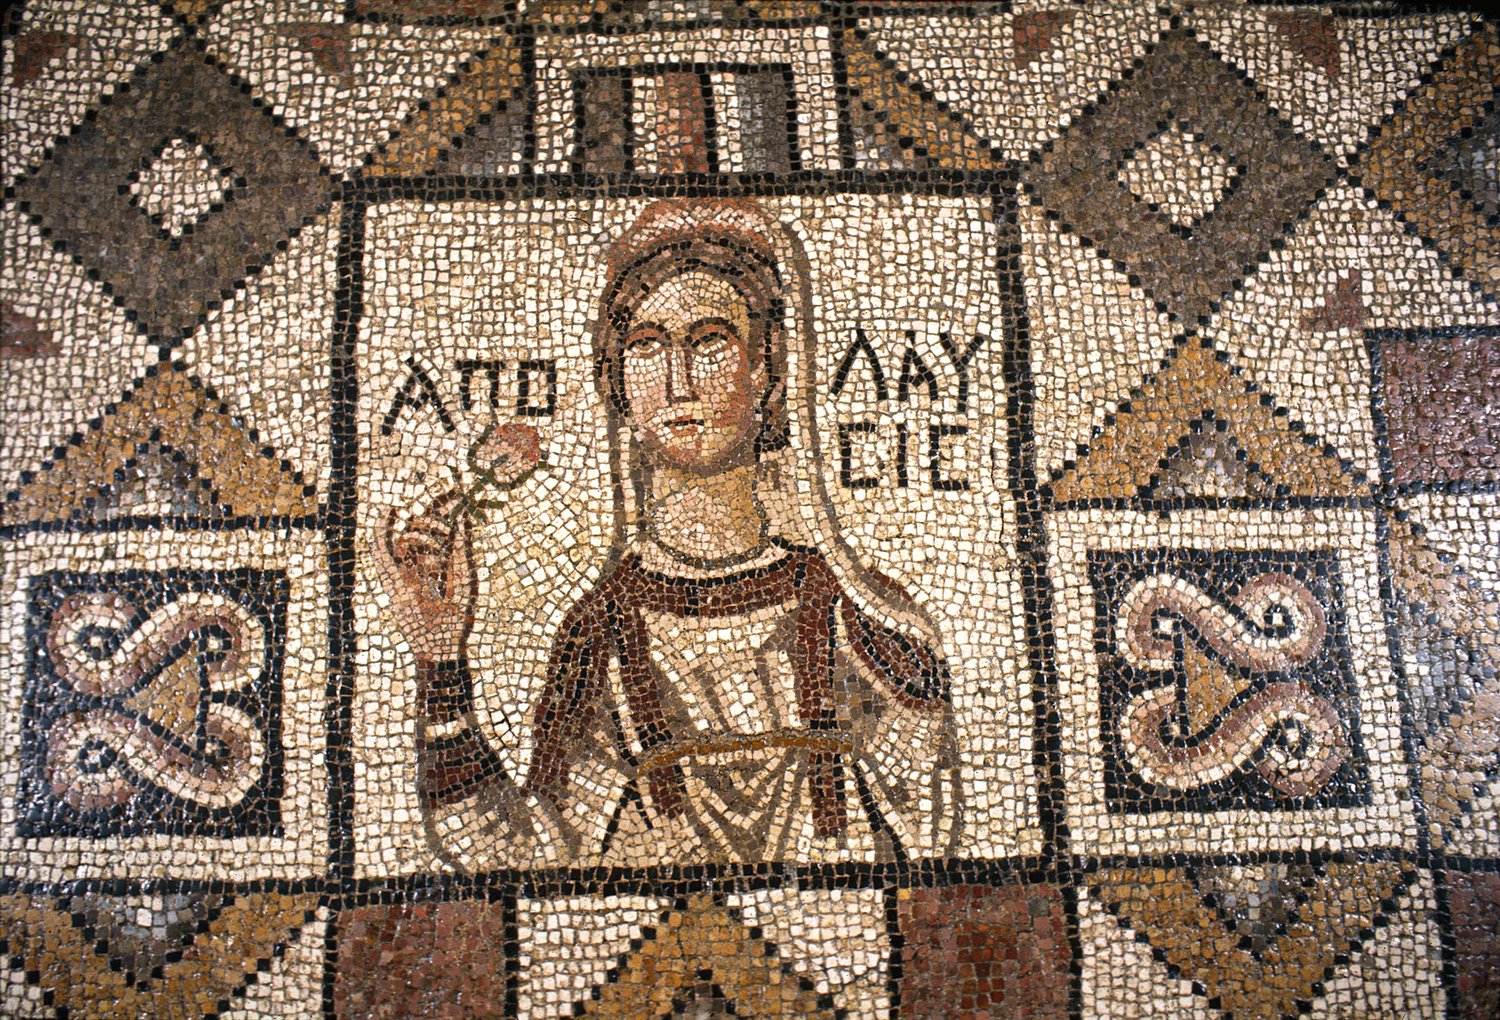
However, I decided to add a new feature- when you looked at a mosaic, I wanted to be able to pop up a screen, displaying both the mosaic from a head-on perspective, and also information about it- such as its name and current location.

A screenshot of the info display within the Model Viewer
This took quite a long time.
In my first attempt, I used the built-in Unity functions of OnMouseEnter() and OnMouseExit() to determine when the cursor was looking at the mosaics- when the mouse entered the confines of a mosaic, code would begin to run, checking to see if the user pressed the “e” button. If they did, then the desired info would all pop up. Once the user pressed “e” again or moved their mouse outside the confines of the mosaic, the information would disappear.
However, while this worked in testing, it didn’t work once the program was built in WebGL and uploaded to the site. This is because for security reasons, browser games can’t move the cursor- thus, the in-game crosshair and the actual mouse didn’t line up, so when the crosshair was hovering over the desired mosaic, the mouse wasn’t, so the code didn’t execute as desired.
To fix this, I had to implement my own method of detection, which was Ray casting. This continually drew a ray from the center of the camera out into the world. I could then detect when that ray hit objects, and which object it hit. Once I knew that, I could check if the object was a mosaic, and if so, it would pull up the info as desired.

The code that displays and hides the Info Display on a key press
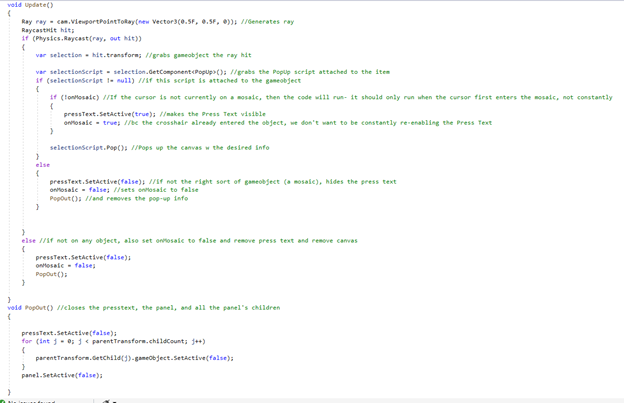
The code that handles the ray casting, and general logic of the system
After this, a smaller problem remained- the images and text didn’t scale properly with window and screen size, but this was easily fixed with a settings change.
However, there is still work that can be done. The exact method of embedding the program in the website is still to be decided. Verge3D, an extension for WordPress, allows for direct hosting of the application, as well as easy full-screening. However, so far, I haven’t found out how to host it without the game being partially cut off. Hosting on simmer.io and embedding using <iframe> allows for a cleaner appearance, but may have legal issues of publicly hosting content including non-public images of mosaics, and doesn’t seem to allow for full-screen.
Additionally, further features could potentially be added, allowing for time, such as recreating the real topography of Antioch within the game, so the house would be positioned as it was in real life.
Benjamin Balfanz